

Tehnical support FAQ
1. The position of the panels does not appear to be perpendicular to the sun.
2. The TIV25E has an END Switch and the TIV25F does not. Is this a problem?
3. You have Engine A and Engine B (2-axis). Is there any difference, or can an A Engine be used in the B construction?
4. What battery does the OG+ use? How do I change it?
5. Do you have a Wi-Fi module?
6. Can we use the LoRa wireless module to set the panels?
7. Can I use your controller boards for any motor, or are they only compatible with your motors?
8. My OG+ tracker does not move. We can hear the motor turning and running, but the panel remains stationary.
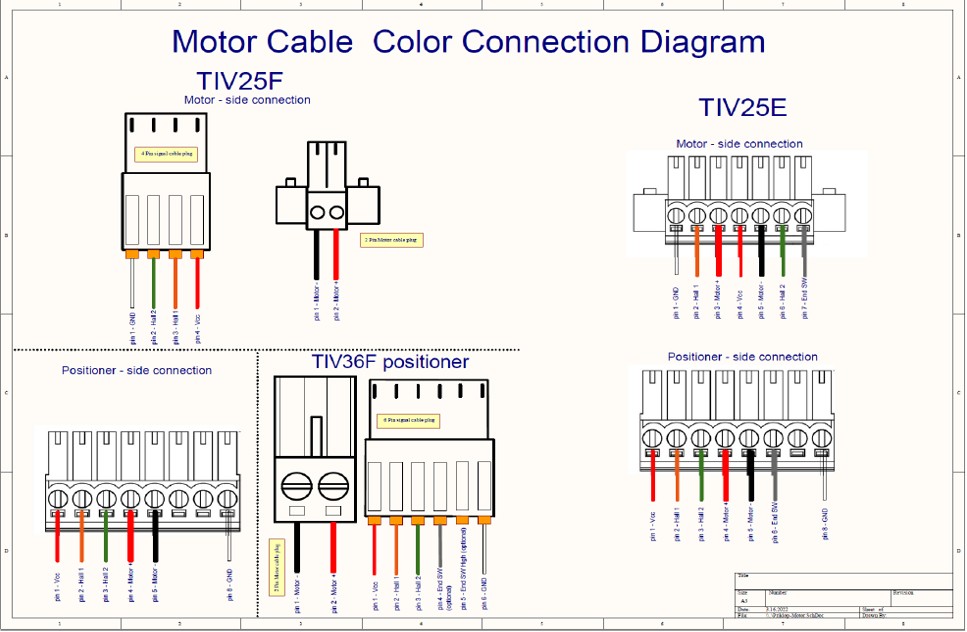
9. I have bought the new MICRO-F positioner, which is different from the one I have. Where can I find information about it? After replacement, there are more parameters to set and we don't really know how and what to enter.
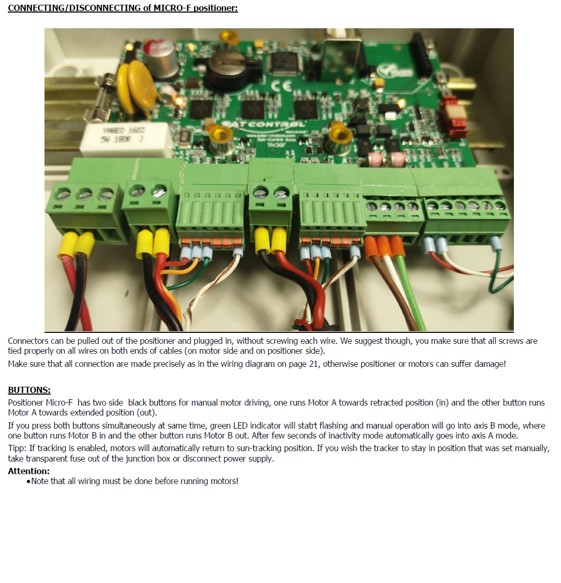
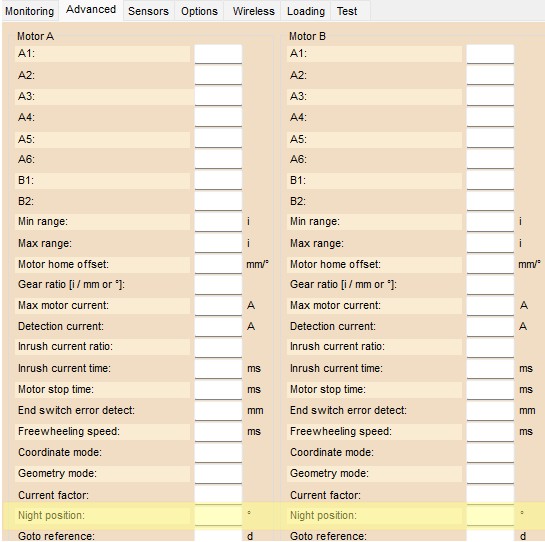
10. I would now like to change the night setting. Which values have to be entered for motor A and motor B for the T (table) position?
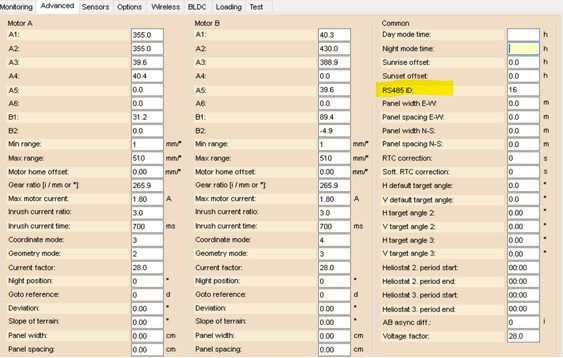
11. I noticed that I cannot change the parameters in Helios Analytics, as the changed parameters revert back to the original value. I can't find a button to save.
12. We bought the motor and controller in our office. Can you please send the software link so we can connect to our office PC?
13. Do the screws of the motor need to be protected against unscrewing, e.g. with glue? If so, what kind?
14. What grease is recommended for the elements working in the engine?
15. Is any periodic work on the engine recommended to keep it running properly longer?
16. The calculated position of the sun (motor B angle) is currently very low and puts the panel in the shadow of the surrounding area. I would like to ask you for help and the possibility of limiting the drive of the motor to a maximum angle of approx. 60°.
17. What is the use of your wireless modules? Can you tell me more about them?
18. Could you please give us some information on the calibration process of our Heliostat to project the sun on a target (instead of tracking the sun for SPV)?
19. How do I install the wireless modules on my trackers ?
20. I have a Heliostat for which we set the target successfully, but a few hours later it missed the target. Is it a problem of callibration?
21. I bought a solar motor sun tracker OG+. I plug it to 12V DC, nothing happens when I press on the East or West button. What can I do to make it work ?
22. Can I use an external switch for the WIND mode setting?
23. Is there a diagram on how to connect an additional button to enable WIND mode?
24. If I have a MICRO-D board, can I also update it to version (8029) to enable an external switch fort he WIND MODE setting? Is this new solution only for MICRO-F boards updated to version (8029)?
25. The A motor of the tracker (2 axis, 4 panels) is blocked. What can I do?
26. I have three solar trackers, ST40M2V2P, and use Helios Analytics 2.0.27. I have a problem with the Helios Analytics program on the laptop. It cannot find any COM port on the laptop. The window where you choose the port is completely empty. I have tried with both Windows 10 and Windows 7 on different laptops, but the same problem occurs. It makes no difference whether I am connected to the tracker or not.
27. There a discrepancy between the local time on my computer and the time displayed on the Helios system. How to resolve this?
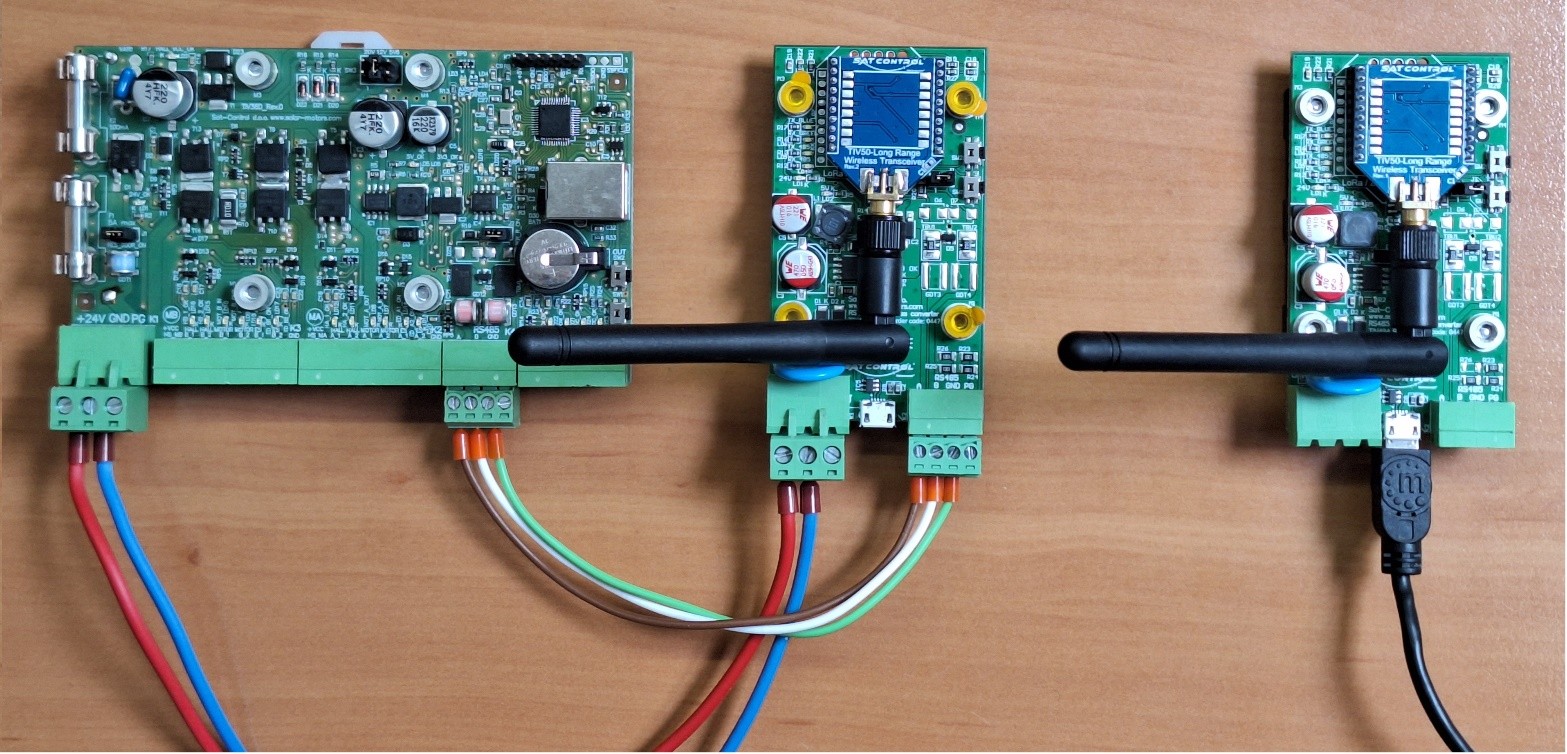
28. I would like to establish wireless communication between my tracker and my computer. The tracker has a MICRO-D positioner. How should I connect them? This is how the converters must be connected for wireless communication with a Micro-D positioner:
This is how the converters must be connected for wireless communication with a Micro-D positioner:
From left to right:
1. TIV36D Micro-D positioner
2. Wireless Slave converter, connected to the positioner through RS485
3. Wireless Master converter, connected to the computer through a USB cable.
29. What is the difference between the MICRO-D and MICRO-F positioners?
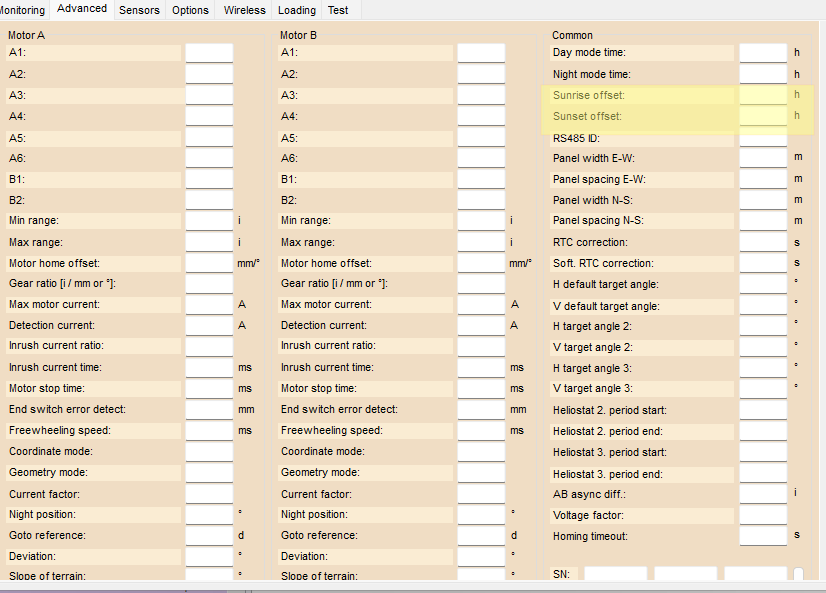
30. I need to stop moving the tracker around 19h at night and to start it around 9h in the morning from flat position.
You can adjust when tracking starts or ends by setting a time offset in relation to sunrise or sunset. In the advanced tab, you can enter how much earlier or later you want tracking to begin or finish compared to the actual sunrise or sunset.
31. What are the advantages of your new heliostat, the HELIO360, over previous models?
32. How do I upgrade my MICRO-D (36D) positioner?
1.Download the latest firmware from this link:
https://solar-motors.com/tehnical-support/software-helios-analytics/?v=ac5585d98646
2. Connect the positioner to your laptop with a USB cable.
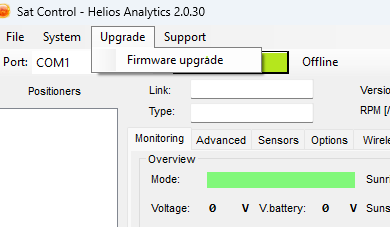
3. Open Helios Analytics → go to the Upgrade tab → select Firmware Upgrade.
4. Click Refresh Port.
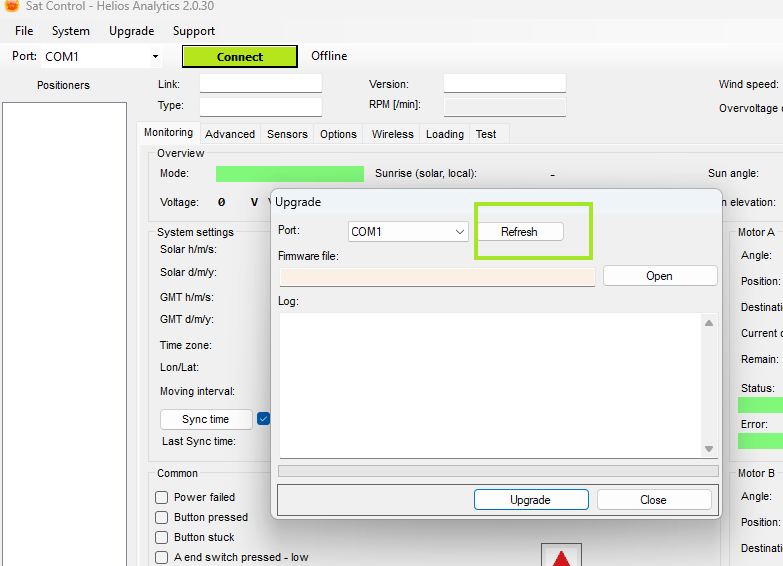
5. Click Open.
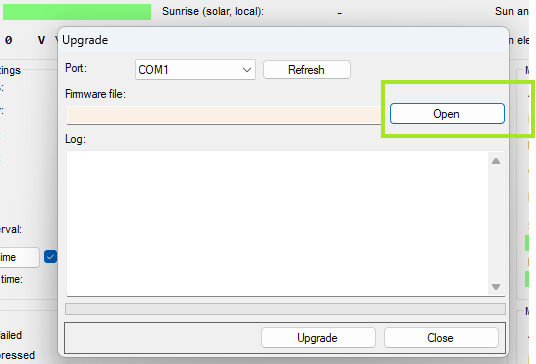
6. In the folder Upgrade Old Boards, first select Firmware file as the file type, then open the folder.
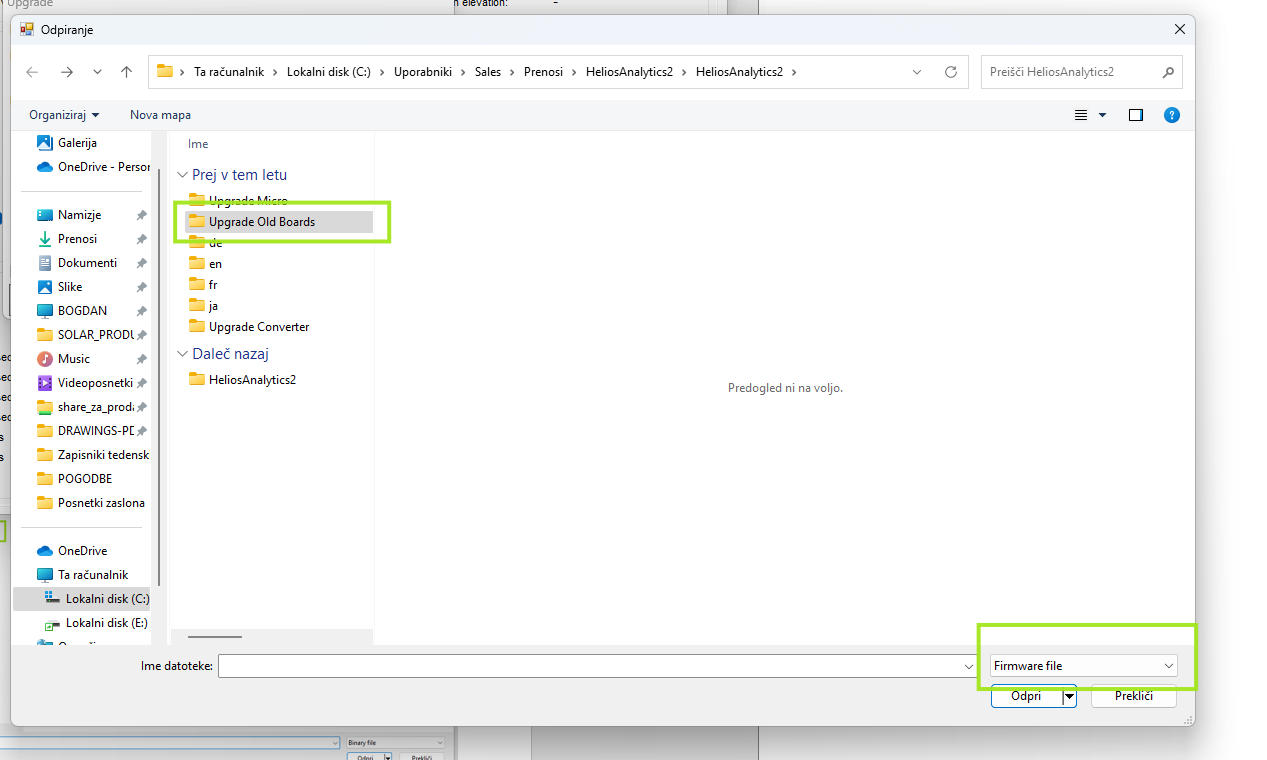
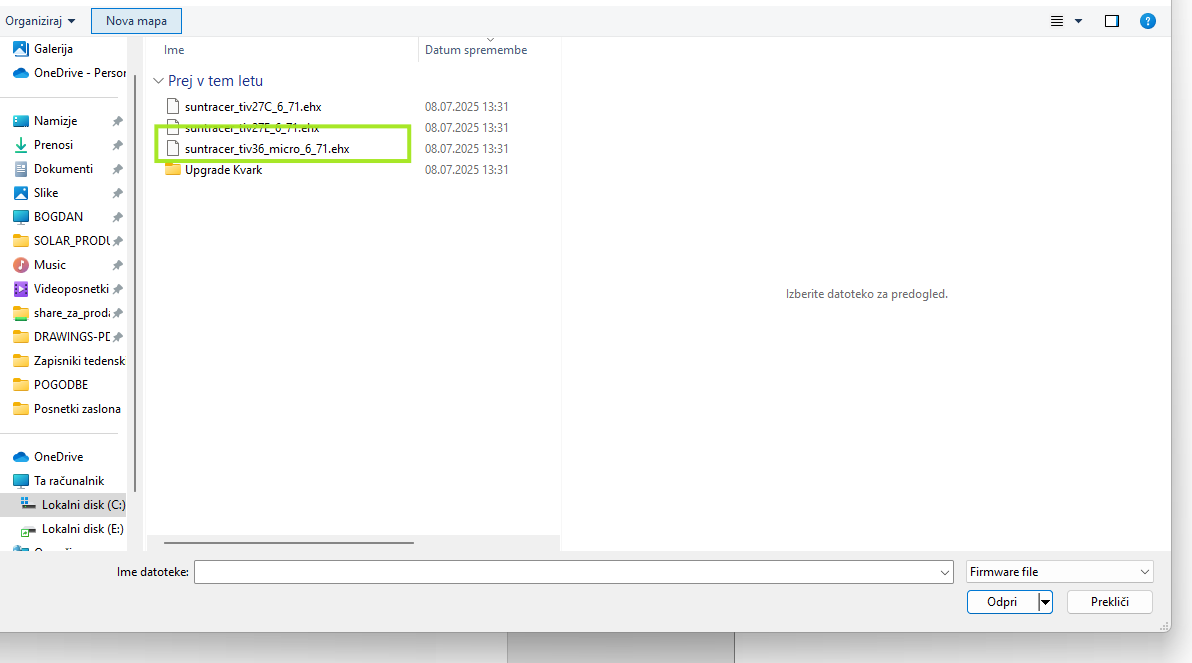
8. Double-click the .ehx file for your model (TIV36_micro).
33. My old motor has 4+2 pins, while the new one has 5+2. How can I fix this?
All our new models have a 5 + 2 connection. Along with the gearmotor/linear motor, you should have received a set of connectors (see image) for you to rewire the cables according to the diagram attached.
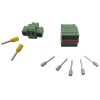
In order to find the extra cable, you will need to strip approximately 5 cm of the motor cable and then pull out the grey wire, which is for the end switch, and connect it to the 5-pin connector.